
65% of websites use the WordPress CMS system. And it’s no wonder why. WordPress offers one of the most comprehensive and user-friendly CMS platforms. Nearly every website I’ve written for uses WordPress, which is why using this system was a no-brainer when I formed my own websites.
If you’re new to WordPress, it can be challenging to navigate its backend. In this WordPress CMS guide, I will mention the most important components of your website, including the features, so you get an in-depth understanding of how WordPress works.
Bottom LineUp Front
WordPress is the largest and most widely used CMS platform. If you’re new to WordPress, it can be difficult to navigate all of the different features, especially if you’re adding a theme or a new plugin. I suggest starting with WordPress’ free plan if you’re unsure if WordPress is right for you.
Creating a WordPress Account
There are two ways to create a WordPress account. You can either sign up directly on the WordPress platform, or you can go through a hosting provider that partners with WordPress.
Signing up With WordPress
If you only need one website and don’t want the hassle of signing up with a hosting provider, you can sign up for an account on the WordPress website. You also receive unlimited email support and, depending on the plan you choose, can also get live chat support.
WordPress has several plan options:
- Free
- Personal: $5 CAD/month
- Premium: $10 CAD/month
- Business: $33 CAD/month
- eCommerce: $59 CAD/month
Keep in mind that these are the prices if you pay annually. The prices increase if you pay monthly. You can get a breakdown of every plan’s features by clicking here. You can click here to sign up for WordPress.
Getting WordPress Through a Hosting Company
Most large hosting companies offer a service called Managed WordPress Hosting, where hosting companies offer different technologies to manage your WordPress website.
A hosting company has more flexible plan options if your WordPress website receives a lot of traffic, if you need more than one domain, and more. Hosting companies offer more security options, such as SSLs, security checks, data backups, and WordPress updates.
I chose this route because I have more than one domain. I chose BlueHost because I knew I was creating more than one website and the Plus plan offers unlimited websites. BlueHost is also affordable; the Plus plan costs about $5 a month, and that’s not even the cheapest plan option.
I always had a good experience using BlueHost. Their support is amazing, setting up an account is easy, and the backend is easy to navigate. But know that BlueHost isn’t your only option. Dreamhost, WP Engine, Siteground, Liquid Web, Kinsta, Namecheap, Flywheel, Hostinger, and A2 Hosting, inc. are some of your other options.
Users
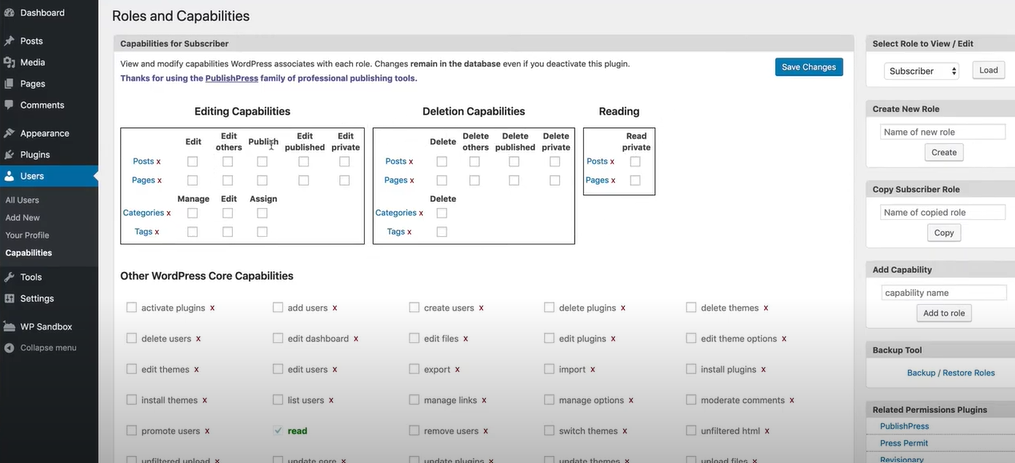
WordPress makes it easy to add multiple users to your website. You can choose different roles for all of your users. These roles include:
- Super admin
- Administrator
- Editor
- Author
- Contributor
- Subscriber
Keep in mind that you might want to list all users as Administrators. I have several photographers on one of my websites, and they couldn’t access my photo plug-in without having an administrative role.
How to Add a User
To add a user, navigate to the User part of the dashboard and click Add New. Add their email and a username, which is required. All other information isn’t required. Set a password for them (WordPress autogenerates a password) and choose their role.
Click the Add a New User button. They will receive an email saying they have been added to your WordPress website. From here, they can log into their WordPress account. I always tell my new users to change their password.
How to Delete a User
When I first started my website, I had another person and a web developer on my backend. One of the users never contributed. The web developer merely installed a theme on my website (I paid way too much money for something I could have done myself).
Once my website grew, I knew I didn’t want these users on my website any longer. Fortunately, deleting users is easy. Simply hover your cursor over the user’s name and click Delete.
Editing Your Profile
When you upload to a WordPress website, your profile will appear under your post. In your profile, you can add a picture, bio, social media links, and more. To edit to profile, click Profile under that same Users section. Fill in the information you want to appear on your profile and click Update Profile.
Navigating the Dashboard

When you log into WordPress, you’ll first access the dashboard. The dashboard offers a one-stop shop for essential things you’ll want to do on your WordPress website. This includes moderating comments, updating plug-ins, and even creating a draft.
You will also see the navigation bar to your left. The navigation bar includes:
- Dashboard
- Plug-Ins
- Posts
- Media
- Pages
- Social Sites
- Special Content
- Comments
- Feedback
- Appearance
- Users
- Tools
- Settings
- Visitor Traffic
You’ll also see a top toolbar where you can view your website, gain quick access to commonly-used areas of the dashboard, and contact WordPress support.
Post vs Page
As you can see, WordPress offers both posts and pages. The difference between the two can be confusing to some — this was definitely confusing for me when I first started using WordPress. So, what’s the difference?
Post
Posts are your blogs. This is the area where you will add a post, edit an existing one, publish your posts, and more. To create a post, go to the Post section and click Add New. To edit or view existing posts, click All Posts. You can filter existing posts by author name, title, tags, and categories. This is also the area where you can see if a post is published or is in draft mode.
Page
Pages are slightly different than posts. These are essential areas of your website that are easy to navigate. Common examples include the About and Contact pages. On the Page section, you can view who created the page, its title, and the date it was published.
Creating Blogs
WordPress makes creating blogs a very simple process. Keep in mind that I’m mentioning creating a blog using the Gutenberg editor, often called the block editor. Some users prefer using WordPress’ classic interface, which I will discuss in the next section.
Getting Started
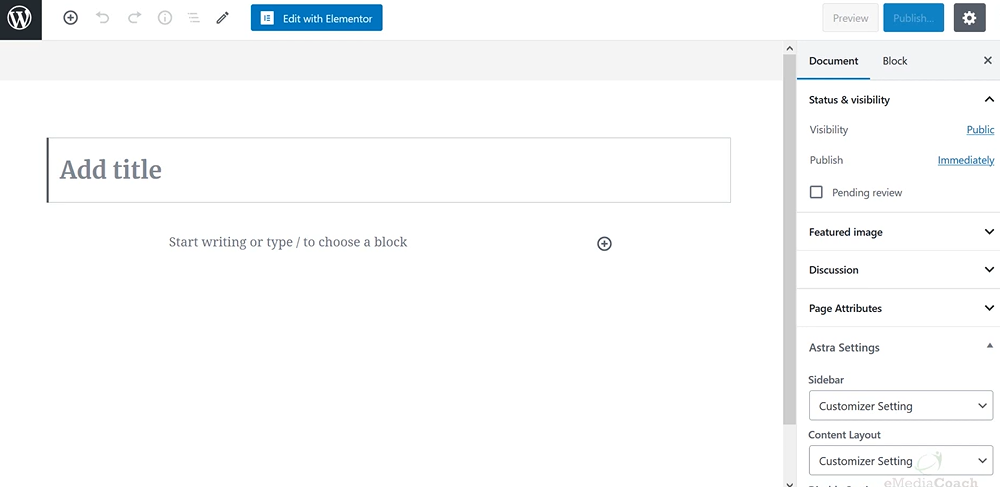
Under Posts, click Add New. If your top header is like mine, you’ll find a + New button where you can also add a new blog. When you come across this page, you’ll see a blank page. You can start by adding a title or text. I like to start with the title first, but sometimes I find it easier to create the content.
To add a title, click the Add Title section and start typing. WordPress will automatically put this as a title header. To add content, click the body of the paragraph. You can also click the + sign at the side if you want to convert the text block to another type of block. I will explain this more in another section.
Organizing Your Text
The block editor makes organizing your text very easy. For example, you can reserve some blocks as headings. This will make your text scannable and easier to read. There are many ways you can customize your text in the block editor to better organize your content. Here are some popular examples:
- List
- Quote
- Table
- Verse
Other Blocks
Text blocks aren’t the only types of blocks that you can add. Most blogs will offer various other blocks, such as media, embeds, widgets, and other design elements. You may also have more blocks, depending on your website theme and plugins.
Media
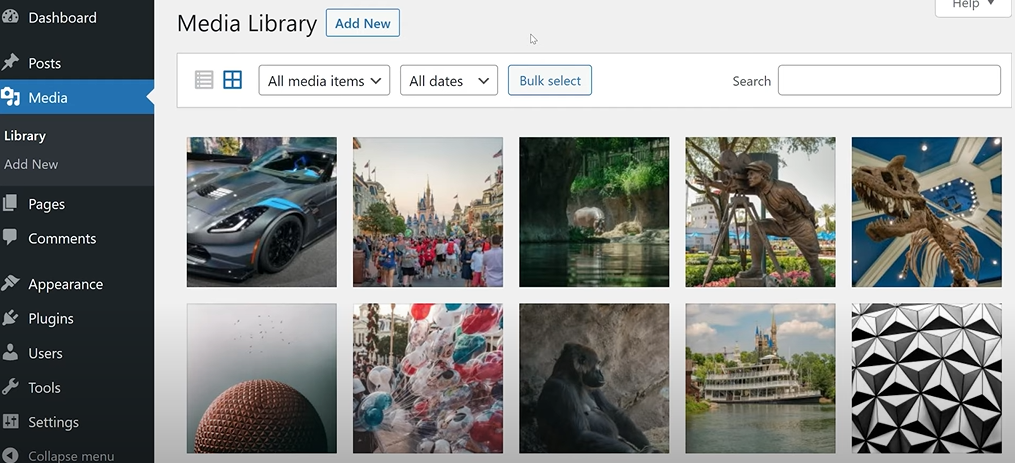
The media block contains everything you need to add images, audio, and even video to your block. Adding media to your blog is very beneficial. Media breaks up your content and makes it more compelling. Different forms of media are also beneficial to your SEO.
Here are the different media blocks you can choose from:
- Gallery
- Image
- Cover
- Audio
- Media & Text
- File
- Image Compare
- Video
- Story
- Slideshow
- Tiled Gallery
Some of these blocks may be confusing to new users. For example, Cover is when you can add overlayed text to any form of media. If you want to include a PDF or other file, you’ll want to select File. If you want to add text to an image or video, you’ll click Media & Text.
Embeds
WordPress also lets you add media and other content from different websites. The most popular example is embedding a video directly from YouTube, but you can also embed social media posts and even Spotify playlists.
Here are all of your embed options:
- YouTube
- Soundcloud
- WordPress
- Flickr
- Spotify
- Animoto
- Vimeo
- Crowdsignal
- Cloudup
- Imgur
- DailyMotion
- Kickstarter
- Issuu
- Mixcloud
- Screencast
- Reverbnation
- Slideshare
- Scribd
- Speakerdeck
- SmugMug
- TED
- TikTok
- VideoPress
- Tumblr
- Amazon Kindle
- WordPress.tv
- Wolfram
- Smartframe
- Loom
- Eventbrite Checkout
- Descript
- Google Calendar
- GIF
- Map
- Podcast Player
Every embed will have different instructions, but you’ll usually have to paste the URL. You can also click the Embed button to add the embed code to different posts and other media.
Widgets
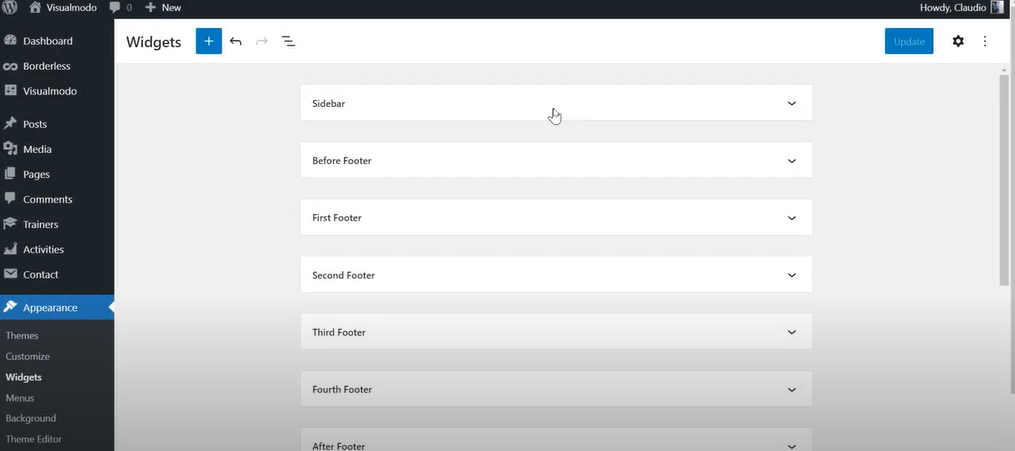
Widgets are little pieces of software that enhance the functionality of your WordPress website. There are countless widgets available on your WordPress website. If you use your WordPress website to attract leads, you can include a calendar to schedule a meeting.
Even if you only host a WordPress blog for content purposes, widgets allow users to see your latest posts and follow you on social media.
Design
There are certain blocks used to enhance the design of your page. These include columns and buttons. For example, if you want to direct your users to your e-commerce page from your blog, you can include a Shop button rather than a hyperlink.
Since I use my WordPress blog for content purposes, I like using the design buttons for stylistic writing purposes. I can insert page breaks, an area where users can “read more,” and even include a second page.
Theme
I will discuss more about themes in a later section. But depending on your theme, the theme may open up some extra blocks to enhance the customization of each blog.
I chose a theme centered around content, so I have additional blocks to enhance my writing and media. I can include my website logo on all of my blogs, change the website navigation, add a post list, upload an avatar, include a text excerpt, include the post date, add Next Post and Previous Post buttons, include a description of the blog, and so much more.
Classic Editor
I’ve been talking about the block editor, but this wasn’t WordPress’ original interface. WordPress didn’t implement the Gutenberg editor until December 2018 — and trust me, WordPress has been around much longer than that.
Before Gutenberg, WordPress had its classic interface that many users became used to; so much so that some content creators struggled to adjust to the Gutenberg editor. I like both and use both Gutenberg and the classic editor regularly for the different websites I write for. But let’s talk about the classic editor.
The classic editor is very simple to use, and the interface is very similar to most word processing platforms, like Microsoft Word and Google Docs. To start writing, you simply click the body of the post and start typing. WordPress will automatically set the text in paragraph form, though you can change the header by clicking the Paragraph drop-down menu.
You also get a range of other customizations that you see in a normal word processing platform, such as:
- Italics
- Bold
- Numbered list
- Bulleted list
- Align text changes
- Quote
- Hyperlinking
- Add media
- Read more tags
If you have any plugins, these may also come up in the toolbar. WordPress also designates an area to add a title. The classic editor is great if you’re just adding text and want a simple interface. But I suggest the block editor if you want something more intricate.
Choosing a Theme
Your theme is the design of your WordPress website. While you can hire a WordPress web designer, a theme is an option if you are on a budget. Themes offer a beautiful interface for your website but are very affordable, oftentimes free.
I don’t remember how much I spent on my theme, but I know it wasn’t more than $100. I’ve had my themes for several years, so that was money well-spent. On my other website, I just downloaded a free theme. Again, I’ve had that theme for years.
Some themes also allow customizations. That was my case for the paid theme. I was able to change the color scheme, fonts, menu placement, and even where I can include my website logo.
There are countless places online where you can find and download themes. I would always search “best WordPress themes for [blank]” and look through the recommendations. Some popular examples you can search for include “best WordPress themes for blogs,” “best free WordPress themes,” and “best WordPress themes for video websites.” Don’t be afraid to search for unique queries.
For the free theme, I knew I wanted it to be black but also easy to read and minimalist. But I wasn’t finding what I was looking for when searching general queries such as “best free WordPress themes.” I searched “best dark WordPress themes,” and that’s how I found that one.
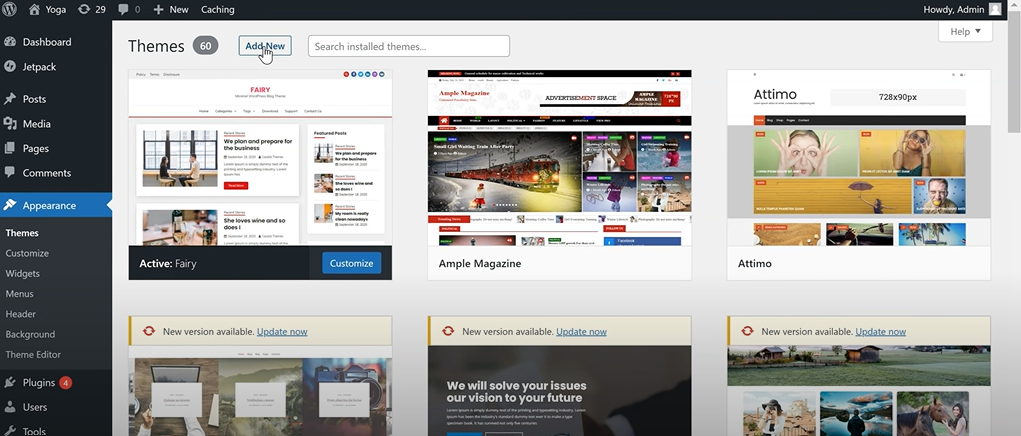
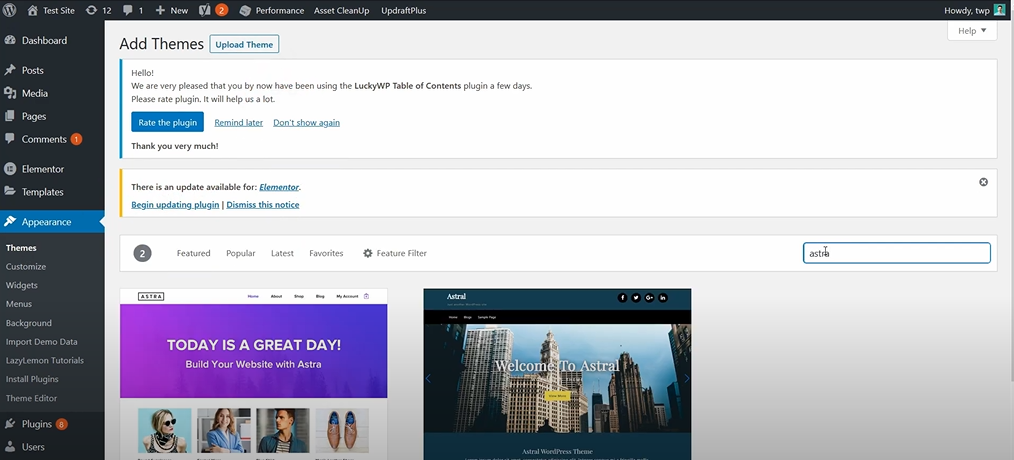
How to Install a Theme
Once you find a theme, you’ll need to install it. On the WordPress dashboard, hover over Appearance and click Themes. Click the Add a New Theme button.
Upload the theme according to the designer’s instructions (it usually involves downloading a file and then uploading it into WordPress). Once you downloaded your theme, I suggest previewing your website with the theme. Once you’re ready to use it, click Activate.
Once you downloaded your theme, you may have plugins available with the theme. You don’t need to download all of them, just the ones you think you’ll need. They’re always available for you to add, so you can always wait to add them to your website.
Your theme may require updates, but you can always auto-update if you’re like me and tend to forget about these updates. The way you do this depends on your hosting platform. If you’re hosting directly on WordPress, you’ll have to go to your theme and enable auto-updates. Since I’m with Bluehost, I can to the Bluehost Settings menu and auto-enable updates.
Plugins
I’ve mentioned plugins before in this blog, but I haven’t explained what they are. Plugins are pieces of software that expand and extend the functionality of your WordPress website. There are thousands of plugins, many are available for free — I don’t think I ever paid for a plugin.
You can find a plugin on the WordPress Plugin Directory. If you’re unsure which plugin you want, I suggest searching for general terms. I searched “SEO,” and various SEO plugins appear. You can also go to Google and search a query such as “WordPress plugins for [blank].” I did this when I was searching for free website security plugins.
When you find a plugin you want, click the plugin and select the Download button. The plugin may be downloaded as a file that you’ll upload to your website (hover over the Plugins section and click Add New). Once you upload the plugin, you’ll have to click Activate.
As with the theme, your plug-ins will have to update. You can enable auto-updates by going to the Plugin page and clicking “Enable auto-updates.” Since I’m with Bluehost, the hosting company auto-updates all of my plugins.
SEO
While WordPress doesn’t offer many SEO capabilities in its backend, you can download various free plugins to customize your SEO.
Yoast is the most popular example; I use Rank Math, but I also have extensive experience with Yoast. Both are similar because you can add a keyword, customize your metadata, and both plugins provide content change suggestions to improve SEO.
I will say I prefer Yoast’s examples. Rank Math’s a little too in-depth; my content is usually short-form, and they’re always recommending that I increase my word count. I feel Yoast’s content suggestions are more in-tune with the type of content you’re writing.
Categories
Categories can be pretty confusing to new users. That’s because categories have two different functions. As the name suggests, categories are used to group your blogs based on type and style. But categories are also used to separate your blogs on your website.
One of my websites is a music website, so I have categories such as Interviews and Album Reviews. When I upload content, I always click on the specific Category section to direct the blog to the appropriate area on my website.
Adding categories is also challenging, and it took me a second to figure this out when I first formed my website. You can either add a new category on the blog itself or on the Category section (hover your cursor over Posts and click Categories). Enter the name of the category followed by the slug. The slug is the text version of the URL that appears after the forward slash.
You can add a parent category, where the category you’re creating will appear under that category. The parent category section is optional, but adding one can be beneficial if you own a multi-niche blog. For example, your blog may cover law with different sections of the law; you may have Family Law with different categories such as Divorce and Child Custody, and the next section could be Criminal Law with different categories such as Theft and Assault.
Finally, you can add a description. Again, this is optional. Adding this section is beneficial because a description may appear automatically on your website or on search engine results.
Now, adding the categories to your menu is what’s really challenging, and it took me a bit to figure this out. To do this, hover your cursor over the Appearance section and click Menu. You’ll immediately see the Main Menu. To add the categories to your menu, go to the Categories drop-down menu. Either check Select All or only check the ones you want to add. Click the Add to Menu button.
After You Publish Your Blog
After you publish your blog, your work isn’t done. You’ll get comments that I suggest you moderate. You may also need to update the blog at a later time.
Moderate the Comments
If you allow comments, anyone on the internet can add a comment to your post. While it can be beneficial to read the input from your readers, you may also get spam and troll comments. I’ve received both on my website, but mainly spam comments.
When a spammer leaves a comment on your website, this creates a black hat backlink to their website. The comment can be something generic; I usually get text such as “this blog is very inspiring and enhanced my knowledge of the topic.”
This sounds legitimate, but when my content is an interview with a heavy metal band, I know that this is a spam comment. I also get random text comments, such as “kljkfshflkslah.” Again, this is obviously spam. Fortunately, WordPress has an easy way to filter these comments. Go to the Comments part of the menu, check the comment, and click the Spam link on top.
Some commenters are just trolls. I’ve had commenters question my authority as a writer and journalist just because they didn’t like a review of mine. I didn’t delete or report their comment because they weren’t harassing me, but I do have WordPress set up to where I have to approve comments.
It can be difficult to change your comment settings because they are unavailable in the comment section. Instead, you’ll have to go to the Dashboard and hover your cursor over Settings. Click Discussion and ensure “Comment must be manually approved” is selected.
Updating the Blog
There may be times when you’ll have to update your blog with new information. I noticed this happened frequently during the height of the COVID-19 pandemic; most blogs and news websites would update their old blogs with new CDC requirements and recent information about vaccines and other medications.
Updating a blog on WordPress is extremely easy, and I’ve had to do this a few times. Go to All Posts and find the blog you want to edit. You can either click the blog or hover over the title and click Edit or Quick Edit. Click Quick Edit if you want to change the title, author, category, or change its publication status.
Click Edit for more in-depth changes. You’ll go back to the original editing backend. Simply make the change you need, whether it’s correcting spelling and grammar errors or updating the blog with new information (I suggest adding an “edit” text with an explanation of what you edited). Click the Update button at the top.
FAQs
Question: What Is a CMS?
Answer: CMS stands for “content management system.” A CMS is used to build, maintain, and modify websites. A CMS is popular among blog owners such as myself, but even e-commerce business owners use a CMS to manage their websites.
Question: Is WordPress the best CMS platform?
Answer: For most users (including myself), WordPress is the best CMS platform. It offers the most customization options and plugins, is user-friendly, and has excellent support capabilities.
The biggest hosting companies also offer Managed WordPress Hosting, which is beneficial if you need more power and security than what WordPress offers. However, there are other CMS options. Popular examples include Squarespace, Wix, Zyro, Webflow, Jimdo, Weebly, Webnode, and Joomla!
I’ve used some of these. Wix is okay, but I didn’t like Weebly at all. I suggest understanding what you need as a website owner and content creator and researching the best CMS for you.
Question: Is WordPress easy to learn?
Answer: Yes and no. Creating, editing, and uploading content is very easy. But it can be challenging to handle the technical aspects, such as uploading and maintaining themes and plugins. Some areas of WordPress also aren’t as self-explanatory, such as creating a menu.
But with experience comes knowledge. You can find tutorials anywhere online, including this blog, and WordPress has a massive support community that can help you.
WordPress CMS Guide: Bottom Line
WordPress is the most-used CMS platform on the internet. It has the most powerful capabilities to host a variety of websites, from a simple blog all the way to an e-commerce store.
But if you’re new to WordPress, the system can be overwhelming. I suggest following this guide if you’re confused about any aspects of WordPress. If you never used WordPress before, I suggest signing up for a free account to see if this is the best CMS platform for you.
Read More:
- How to Cancel Grammarly & Get a Refund - April 20, 2023
- Best Affiliate Networks Guide: Finding a Quality Partner for Your Blog - October 20, 2022
- Webflow CMS Guide: Is This Platform Right for You? - October 20, 2022

